Easy Dill Dip Recipe – Creamy Herb Flavor
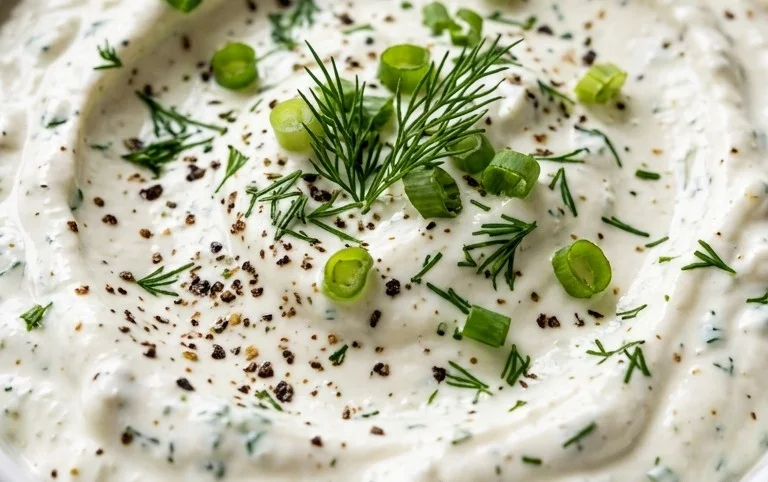
Dill Dip is more than just a condiment; it’s a declaration of vibrant flavor that instantly elevates any gathering. Imagine this: a creamy, tangy sensation bursting with the fresh, herbaceous notes of dill, perfectly balanced with a hint of garlic and lemon. It’s the kind of dip that disappears in minutes, leaving everyone asking for the recipe. Why do we all adore this simple yet sophisticated creation? It’s its incredible versatility, of course! From crisp vegetable platters and crunchy chips to grilled fish and chicken, this glorious Dill Dip is the quintessential accompaniment. What truly makes it special is the way it transforms the ordinary into the extraordinary, offering a bright, refreshing counterpoint to richer dishes. It’s my go-to for parties, potlucks, or even just a quiet evening snack because it’s guaranteed to bring smiles all around. Let’s dive into creating this irresistible Dill Dip together!
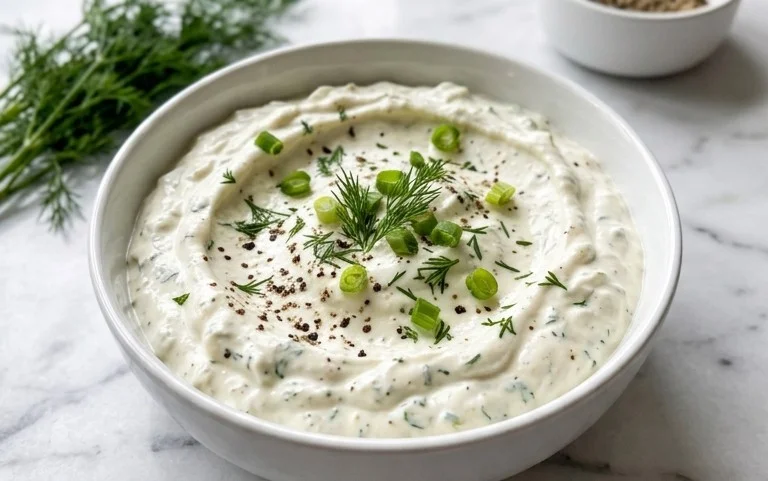
Dill Dip
Dill dip is one of those magical recipes that’s incredibly simple to make but delivers an explosion of flavor. It’s the perfect accompaniment to a wide array of snacks, from crisp vegetables and crackers to a delightful spread for sandwiches. The herbaceous notes of fresh dill, combined with the creamy tang of sour cream and mayonnaise, create a harmonious balance that’s utterly addictive. I’ve been making this dill dip for years, and it’s always a crowd-pleaser. Whether you’re hosting a party, packing a picnic, or just craving a delicious dip, this recipe is a guaranteed winner. It’s so easy, you can whip it up in minutes, and the results are always fantastic.
Ingredients:
- 1 cup full-fat sour cream
- 2/3 cups mayonnaise
- 1 tablespoon dill weed
- 1 tablespoon minced onion
- 3 teaspoon garlic powder
- ¼ – ½ teaspoon salt to taste
Instructions:
Creating this delightful dill dip is a straightforward process, requiring no cooking whatsoever. The magic happens in the mixing bowl, where simple ingredients transform into a flavorful condiment. Let’s get started!
1. Gather Your Ingredients and Tools: Before you begin, ensure you have all your ingredients measured out and ready to go. You’ll need a medium-sized mixing bowl, a whisk or a sturdy spoon for stirring, and your measuring cups and spoons. Having everything prepped makes the entire process smooth and efficient. I like to use full-fat sour cream for the richest flavor and creamiest texture, but you can adjust this if you prefer a lighter option, though it might slightly alter the final consistency. The mayonnaise also plays a crucial role in adding a smooth, emulsified base.
2. Combine the Creamy Bases: In your medium-sized mixing bowl, add the 1 cup of full-fat sour cream. This forms the primary creamy foundation of our dip. Next, add the 2/3 cups of mayonnaise. It’s important to use good quality mayonnaise for the best flavor. Give these two ingredients a gentle stir together just to begin incorporating them. Don’t worry about making them perfectly smooth at this stage; that will happen as you add the other ingredients. The goal here is to start creating a cohesive creamy mixture.
3. Incorporate the Flavor Powerhouses: Now it’s time to add the star flavors! Sprinkle in the 1 tablespoon of dill weed. If you’re using fresh dill, make sure it’s finely chopped. Dried dill weed works beautifully here too, and it’s often more potent, so a tablespoon is a good starting point. Next, add the 1 tablespoon of minced onion. You can use pre-minced onion from a jar for convenience, or finely mince a small shallot or a piece of yellow onion yourself. The onion adds a subtle pungent kick that complements the dill. Finally, add the 3 teaspoons of garlic powder. Garlic powder is a pantry staple that provides a consistent and readily available garlic flavor without the harshness of raw garlic.
4. Season and Blend: With all the main flavor ingredients in the bowl, it’s time to truly blend everything together. Use your whisk or spoon to vigorously stir the mixture until it’s smooth and well combined. You want to ensure there are no pockets of sour cream or mayonnaise visible and that the dill, onion, and garlic powder are evenly distributed throughout. This is also the point where you’ll season with salt. Start with ¼ teaspoon of salt and stir it in. Then, taste the dip. This is crucial! Everyone’s preference for salt varies, and the salt helps to enhance all the other flavors. Add the remaining ¼ teaspoon, or even a pinch more if you deem it necessary, tasting as you go. You’re aiming for a balanced flavor where no single ingredient overpowers the others.
5. Chill and Serve: Once you’ve achieved the perfect consistency and seasoning, cover the bowl tightly with plastic wrap or transfer the dip to an airtight container. For the best flavor, it’s highly recommended to let the dill dip chill in the refrigerator for at least 30 minutes before serving. This chilling period allows the flavors to meld together, deepen, and become even more harmonious. The dill and onion flavors will infuse more thoroughly into the creamy base, creating a more complex and satisfying taste. When you’re ready to serve, give it another quick stir. This dill dip is incredibly versatile. It’s absolutely divine with an assortment of fresh vegetables like carrot sticks, celery sticks, bell pepper strips, cucumber slices, and broccoli florets. It’s also a fantastic partner for potato chips, tortilla chips, pita chips, and an assortment of crackers. You can even use it as a spread for your favorite sandwiches, wraps, or as a dip for mini quiches or spring rolls. Enjoy every delicious scoop!
Conclusion:
I hope you’re as excited as I am to whip up this incredibly versatile dill dip! Its creamy texture, bright herbaceous flavor, and effortless preparation make it an absolute winner for any occasion. Whether you’re hosting a game night, planning a potluck, or simply looking for a delicious way to elevate your everyday snacks, this dill dip is sure to impress. It’s a crowd-pleaser that’s both sophisticated enough for a party and simple enough for a weeknight treat.
Don’t be afraid to get creative with your serving suggestions! This dip is fantastic with a rainbow of fresh vegetables like carrots, celery, bell peppers, and cucumber. It’s also a perfect partner for crispy potato chips, pita bread, or even as a spread for sandwiches and wraps. The beauty of this recipe lies in its adaptability, and I truly encourage you to give it a try and discover your favorite ways to enjoy it.
Frequently Asked Questions:
Can I make this dill dip ahead of time?
Absolutely! This dill dip actually tastes even better when it has a chance to chill in the refrigerator for at least 30 minutes to an hour. This allows the flavors to meld together beautifully. You can easily make it a day in advance and store it covered in the fridge.
What are some good variations for this dill dip recipe?
The possibilities are endless! For a bit of heat, try adding a pinch of cayenne pepper or some finely chopped jalapeños. If you love garlic, a clove of minced fresh garlic can be a wonderful addition. You can also swap out some of the sour cream for Greek yogurt for a tangier, lighter version, or add a sprinkle of smoked paprika for a subtle smoky note. Experiment and find your perfect flavor profile!
How long will the dill dip last in the refrigerator?
Properly stored in an airtight container, your delicious dill dip should stay fresh in the refrigerator for about 3 to 4 days. This makes it a fantastic make-ahead option for parties or a great way to have a healthy snack on hand throughout the week.
Dill Dip
A classic and creamy dill dip perfect for vegetables, chips, or as a spread.
Ingredients
-
1 cup full-fat sour cream
-
2/3 cups mayonnaise
-
1 tablespoon dill weed
-
1 tablespoon minced onion
-
3 teaspoon garlic powder
-
1/4 teaspoon salt
Instructions
-
Step 1
In a medium bowl, combine the sour cream and mayonnaise. -
Step 2
Add the dill weed, minced onion, and garlic powder to the bowl. -
Step 3
Stir all ingredients together until well combined. -
Step 4
Season with salt to taste. Start with 1/4 teaspoon and add more if desired. -
Step 5
For best flavor, cover and refrigerate for at least 30 minutes before serving.
Important Information
Nutrition Facts (Per Serving)
It is important to consider this information as approximate and not to use it as definitive health advice.
Allergy Information
Please check ingredients for potential allergens and consult a health professional if in doubt.